

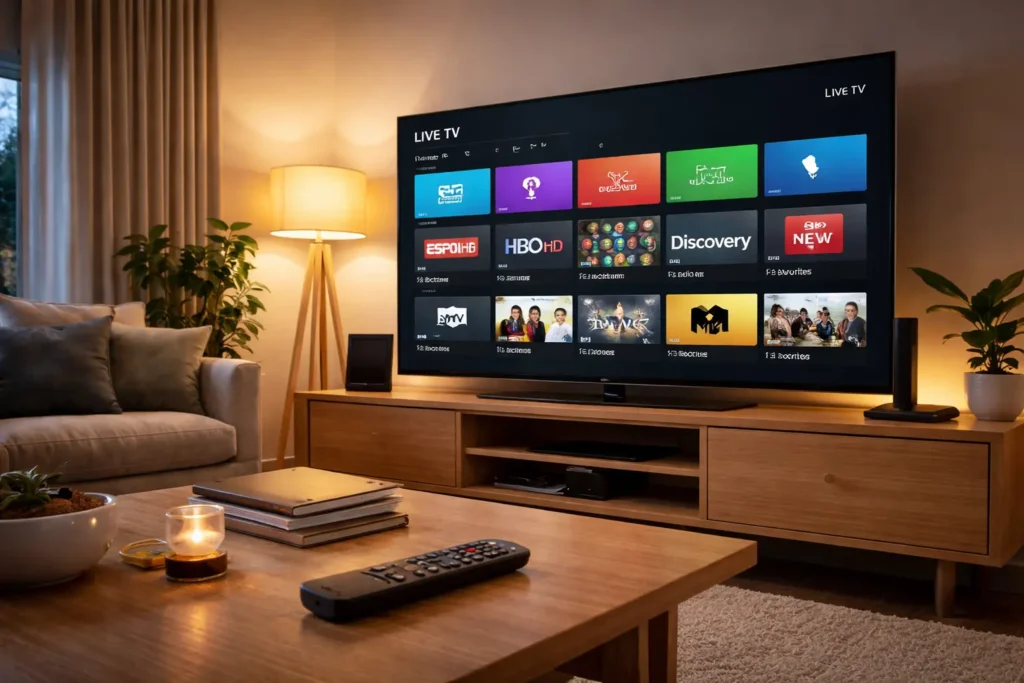
The Amazon Firestick is the most popular device for watching IPTV on Firestick Canada. It’s affordable, easy to use, and works with every major IPTV app on the market. Whether you just bought your first Firestick or you’ve been using one for years, setting up IPTV takes less than 10 minutes when you follow the right steps.
This guide walks you through everything. You’ll learn how to prepare your Firestick, install the two best IPTV apps (IPTV Smarters Pro and TiviMate), connect your IPTV subscription, and fix common issues. We also cover which Firestick model works best for IPTV streaming in Canada and how to get the smoothest playback possible.
If you don’t have an IPTV subscription yet, you can explore IPTV plans that work with Firestick and get started right away.
What You Need Before You Start
Before installing any IPTV app on your Firestick, make sure you have these four things ready.
An active IPTV subscription. You need a provider that gives you login credentials. These come in two formats: Xtream Codes (a server URL, username, and password) or an M3U URL. Your provider sends these by email or WhatsApp after you subscribe.
An Amazon Firestick. Any model works. The Fire TV Stick HD, Fire TV Stick 4K Plus, and Fire TV Stick 4K Max are all compatible. We recommend the 4K Max for the best experience (more on that below).
A stable internet connection. You need at least 16 Mbps for HD streaming. For 4K content, aim for 25 Mbps or higher. Most Canadian ISPs like Rogers, Bell, Shaw, and Telus provide enough speed on their standard plans.
A TV with an HDMI port. Your Firestick plugs directly into the HDMI port on your television. No extra cables or adapters are needed.
Once you have everything, the entire setup takes about 5 to 10 minutes.
Which Amazon Firestick Model Is Best for IPTV in Canada?
Not all Firestick models perform the same when running IPTV apps. The processor speed, RAM, and Wi-Fi capabilities make a real difference in how fast channels load and whether you experience buffering.
Fire TV Stick 4K Max (Recommended)
The Fire TV Stick 4K Max (2nd Gen) is the best Firestick for IPTV in Canada. It supports Wi-Fi 6E, which opens up the less congested 6GHz band. This matters if you live in a busy apartment building or have many smart devices at home. It comes with 2GB of RAM and 16GB of storage, which is double the storage of older models. It handles IPTV apps like TiviMate and IPTV Smarters without any lag, even when loading large channel lists with thousands of entries.
It supports 4K Ultra HD, Dolby Vision, HDR10+, and Dolby Atmos audio. If your TV supports 4K, this is the model to get. It retails for around C$79.99 on Amazon Canada and frequently goes on sale.
Fire TV Stick 4K Plus
The Fire TV Stick 4K Plus is a solid mid-range option. It supports Wi-Fi 6 (not 6E), 4K streaming, Dolby Vision, and HDR10+. It has the same 2GB of RAM as the 4K Max but lacks the 6GHz Wi-Fi band. For most Canadian households, this model handles IPTV just fine. It is a good choice if you want 4K without paying the premium for the Max.
Fire TV Stick HD
The Fire TV Stick HD is the budget option. It streams at 1080p maximum and runs on Wi-Fi 5. It works for IPTV, but channel switching is a bit slower and you won’t get 4K or HDR content. If you’re setting up IPTV on a secondary TV (like a bedroom), this is a good enough pick.
Quick Comparison
| Feature | Fire TV Stick HD | Fire TV Stick 4K Plus | Fire TV Stick 4K Max |
|---|---|---|---|
| Max Resolution | 1080p | 4K Ultra HD | 4K Ultra HD |
| Wi-Fi | Wi-Fi 5 | Wi-Fi 6 | Wi-Fi 6E |
| RAM | 1 GB | 2 GB | 2 GB |
| Storage | 8 GB | 16 GB | 16 GB |
| HDR Support | No | Dolby Vision, HDR10+ | Dolby Vision, HDR10+ |
| Approx. Price (CAD) | ~C$39.99 | ~C$59.99 | ~C$79.99 |
| IPTV Rating | Good | Very Good | Best |
Our recommendation: Go with the Fire TV Stick 4K Max if your budget allows it. The extra RAM, faster processor, and Wi-Fi 6E support make a noticeable difference in daily IPTV use. If you want to understand how IPTV compares to traditional cable on these devices, our IPTV vs cable comparison for Canada breaks it down clearly.
How to Prepare Your Firestick for IPTV Apps
IPTV apps like IPTV Smarters Pro and TiviMate are not available on the Amazon App Store. You need to “sideload” them, which simply means downloading them from a trusted source using the Downloader app. This is safe, easy, and takes about two minutes.
Step 1 — Enable Developer Options
On the 2026 Firestick interface, developer options are hidden by default. Here’s how to activate them:
- From the home screen, go to Settings (the gear icon on the right).
- Select My Fire TV.
- Select About.
- Highlight your device name (for example, “Fire TV Stick 4K Max”) and click it 7 times rapidly.
- You’ll see a message at the bottom saying “You are now a developer.”
Step 2 — Allow Apps from Unknown Sources
- Go back to Settings > My Fire TV.
- You’ll now see Developer Options in the menu. Open it.
- Select Install Unknown Apps.
- Find the Downloader app in the list and toggle it to ON.
This allows the Downloader app to install IPTV apps that aren’t in the Amazon Store.
Step 3 — Install the Downloader App
- From the Firestick home screen, go to the Search icon (the magnifying glass).
- Type Downloader.
- Select the Downloader app (it has an orange icon with a downward arrow).
- Click Download or Get to install it.
That’s it. Your Firestick is now ready to install IPTV apps. For a visual walkthrough with screenshots for every device type, check out our complete installation guide.
How to Install IPTV Smarters Pro on Firestick (Step-by-Step)
IPTV Smarters Pro is one of the most widely used IPTV apps in the world. It is free, supports multiple playlists, and works well with the Firestick remote. Here’s how to install it.
Step 1 — Open Downloader and Enter the URL
- Open the Downloader app from your home screen.
- In the URL field, type the download address for IPTV Smarters Pro. Your IPTV provider usually includes this in your welcome email. A common source is the official IPTV Smarters website.
- Click Go.
Step 2 — Download and Install the APK
- Wait for the APK file to download. This takes about 30 seconds.
- When the download finishes, a prompt appears. Click Install.
- After installation completes, click Done (not Open, so you can delete the file first).
- The Downloader app will ask if you want to delete the APK file. Click Delete to free up storage space.
Step 3 — Launch IPTV Smarters and Add Your Account
- Find IPTV Smarters Pro on your home screen under Your Apps & Channels. You might need to scroll right or click “See All.”
- Open the app. On first launch, select TV as your device type and click Save.
- Click Accept on the terms screen.
- Choose your login method:
- Login with Xtream Codes API (most common): Enter the server URL, username, and password from your IPTV provider.
- Load Your Playlist or File URL: Paste your M3U URL if your provider uses that format.
- Click Add User.
Step 4 — Start Watching
Once your credentials are accepted, your channels, movies, and series will load. You can browse by category (Live TV, Movies, Series) and start watching right away. The app also supports an Electronic Program Guide (EPG) if your provider includes one.
How to Install TiviMate on Firestick (Step-by-Step)
TiviMate is widely considered the best IPTV player for Firestick in 2026. Its interface looks and feels like a professional cable box, and it offers advanced features like multi-view, catch-up TV, and recording (with external storage). It is also not available on the Amazon App Store, so we’ll sideload it the same way.
Step 1 — Download TiviMate via Downloader
- Open the Downloader app.
- In the URL field, type the official TiviMate APK download address. You can find this on the TiviMate website (tivimate.com) or through a trusted source your IPTV provider recommends.
- Click Go and wait for the download.
Step 2 — Install and Open
- When the download finishes, click Install.
- Click Done, then delete the APK file when prompted.
- Go to your home screen and find TiviMate under Your Apps & Channels.
- Open the app.
Step 3 — Add Your IPTV Playlist
- TiviMate will ask you to add a playlist on first launch. Click Add Playlist.
- Choose your input type:
- Xtream Codes (recommended): Enter the server URL, username, and password.
- M3U Playlist: Paste your full M3U URL.
- Click Next and wait 30 to 60 seconds while TiviMate loads your channel list and EPG data. Do not close the app during this process.
- Name your playlist (for example, “My IPTV Canada”) and click Done.
Step 4 — Set Up EPG and Favorites
Once the playlist loads, you’ll see channels organized by category in a sidebar. Use the left arrow on your remote to open the category menu.
To set up the TV guide (EPG), go to Settings > EPG > Update. This loads the program schedule so you can see what’s playing now and what’s coming up.
To add channels to your favorites, highlight any channel and long-press the Select button on your remote. This makes it easy to find your most-watched Canadian channels quickly.
Free vs Premium TiviMate — Is the Upgrade Worth It?
The free version of TiviMate works, but it limits you to one playlist and disables key features like recording, multi-view, catch-up TV, and full EPG customization.
TiviMate Premium costs about US$4.99 per year (or US$19.99 for lifetime access). You purchase it through the TiviMate Companion app on an Android phone via the Google Play Store. Once activated, the premium features unlock automatically on your Firestick.
For most IPTV users, the premium upgrade is worth it. The recording feature alone makes it a strong choice for anyone who watches live sports or wants to catch shows they missed.
IPTV Smarters Pro vs TiviMate Which App Should You Use?
Both apps work great on Firestick, but they serve slightly different needs. Here’s a quick comparison to help you decide.
| Feature | IPTV Smarters Pro | TiviMate |
|---|---|---|
| Price | Free | Free (limited) / Premium ~$5/year |
| Interface Style | App-based (grid layout) | Cable TV style (channel list + EPG) |
| EPG (TV Guide) | Basic | Advanced with 14-day guide |
| Multi-Playlist Support | Yes | Yes (Premium only) |
| Recording | No | Yes (Premium, external storage needed) |
| Multi-View | No | Yes (Premium) |
| Catch-Up TV | No | Yes (if provider supports it) |
| Best For | Beginners, simple setup | Power users, daily IPTV watchers |
Our take: If you’re new to IPTV and want the simplest setup, start with IPTV Smarters Pro. If you plan to use IPTV as your main TV source (replacing cable), TiviMate Premium is the better long-term choice. Many Canadian IPTV users end up switching to TiviMate after trying Smarters first.
Troubleshooting Common IPTV Issues on Firestick
Even with a solid setup, you might run into occasional issues. Here are the most common problems and how to fix them.
IPTV App Won’t Install
If the APK fails to install, go back to Settings > My Fire TV > Developer Options > Install Unknown Apps and make sure the Downloader app is toggled to ON. Also check that your Firestick has enough free storage. Go to Settings > My Fire TV > About > Storage to verify.
Buffering or Freezing During Playback
Buffering is usually caused by a slow or unstable internet connection. Try these fixes:
- Move your Firestick closer to your Wi-Fi router, or switch to the 5GHz band in your router settings.
- Close all background apps on your Firestick (hold the Home button and select “Apps”, then force stop anything you’re not using).
- If possible, use an Amazon Ethernet Adapter for a wired connection. This gives you the most stable speeds.
- Lower the stream quality in your IPTV app settings if your internet speed is below 25 Mbps.
Login Failed or “Unable to Connect”
Double-check that you entered the server URL, username, and password exactly as your provider sent them. Even a small typo will cause a login failure. If you copied the credentials, make sure no extra spaces were added. Also confirm that your IPTV subscription is still active.
Channels Not Loading or Black Screen
This can happen when your provider’s server is temporarily down or when your playlist data is outdated. In IPTV Smarters, go to Settings and refresh your playlist. In TiviMate, go to Settings > Playlists > select your playlist > Update Playlist. If the issue continues, contact your IPTV provider’s support team.
App Crashes After Opening
Clear the app’s cache by going to Settings > Applications > Manage Installed Applications > select the IPTV app > Clear Cache. If that doesn’t work, uninstall and reinstall the app using Downloader.
Tips to Get the Best IPTV Experience on Firestick in Canada
A few small adjustments can make a big difference in your streaming quality.
Use your router’s 5GHz or 6GHz band. The 2.4GHz band is slower and more crowded. Most modern Canadian routers support 5GHz. If you have a Wi-Fi 6E router and the Firestick 4K Max, you can use the 6GHz band for even faster speeds.
Close background apps. The Firestick has limited RAM. Running multiple apps in the background can slow down your IPTV player. Long-press the Home button and close anything you don’t need.
Keep your Firestick software updated. Go to Settings > My Fire TV > About > Check for Updates. Amazon regularly releases performance improvements.
Restart your Firestick weekly. A quick restart clears temporary files and keeps things running smoothly. Go to Settings > My Fire TV > Restart.
Pick a provider with anti-freeze technology and fast servers. The quality of your IPTV experience depends heavily on your provider’s server infrastructure. Look for providers that offer 4K streaming, stable uptime, and responsive customer support. You can compare the best IPTV services in Canada for 2026 to find a reliable option.
Is IPTV Legal in Canada?
IPTV technology is completely legal in Canada. Major Canadian telecom companies like Bell (Fibe TV) and Telus (Optik TV) use the same IPTV technology to deliver their TV services. What matters legally is how the content is sourced and whether the provider holds proper distribution rights.
Using a Firestick to watch IPTV is no different from using any other streaming device. The device itself is legal, and the apps (IPTV Smarters, TiviMate) are legal media players that don’t host any content.
For a detailed breakdown of Canadian IPTV laws and how to choose a trustworthy provider, read our full guide on whether IPTV is legal in Canada.
Frequently Asked Questions
1. Can I use IPTV on any Firestick model in Canada?
Yes. IPTV works on every Firestick model, including the Fire TV Stick HD, Fire TV Stick 4K Plus, Fire TV Stick 4K Max, and Fire TV Cube. The newer models with more RAM and faster processors give you a smoother experience, but the basic steps are identical across all models.
2. What internet speed do I need for IPTV on Firestick?
You need at least 16 Mbps for standard HD streaming. For 4K content without buffering, aim for 25 Mbps or higher. Most Canadian internet plans from providers like Rogers, Bell, Shaw, and Telus already meet these requirements on their mid-tier plans.
3. Is IPTV Smarters Pro free to use on Firestick?
Yes. IPTV Smarters Pro is completely free. You do not need to pay for the app itself. However, you do need an active IPTV subscription from a separate provider to actually watch content. The app is just the player.
4. Do I need a VPN for IPTV on Firestick in Canada?
A VPN is not required to use IPTV on Firestick. However, some users choose to use one for privacy, to prevent ISP throttling, or to access geo-restricted content. If your stream buffers frequently and your internet speed is fine, a VPN can sometimes help by preventing your ISP from slowing down streaming traffic.
5. How do I fix buffering on my Firestick IPTV app?
Start by checking your internet speed (you need at least 16 Mbps for HD). Switch to your router’s 5GHz Wi-Fi band if possible. Close all unused background apps on your Firestick. Clear the IPTV app’s cache in Settings > Applications. If the issue continues, try using an Ethernet adapter for a wired connection, or lower the stream quality inside the app.=
Start Streaming IPTV on Your Firestick Today
Setting up IPTV on an Amazon Firestick in Canada is straightforward. Pick your Firestick model, prepare it for sideloading, install IPTV Smarters Pro or TiviMate, and enter your subscription credentials. The entire process takes under 10 minutes.
The key to a great experience is pairing your Firestick with a reliable IPTV provider that offers stable servers, 4K streaming, and responsive support. Once you have that, your Firestick becomes the only streaming device you need.
Ready to get started? Browse IPTV subscription plans and start watching thousands of live channels, movies, and series on your Firestick today.